RI Landscaper 855RILAWNS

Landscaper Serving Southern Rhode Island Since 2001

  • Request Quote
  • About
    • Our Company
    • Our People
    • Guarantee & Insurance
    • Charity
    • Referral Program
    • FAQ
  • Packages
    • Minimalist Landscaping Package
    • Essentials Landscaping Package
    • Premier Landscaping Package
  • Services
    • Lawn Mowing
    • Spring & Fall Cleanups
    • Environmentally-friendly Fertilization
    • Mosquito & Tick Prevention Program
    • Lawn Renovation
    • Gardening
    • Hardscape Construction RI
    • Firewood For Sale
    • Lawn Mower Repair Service
    • RI Mulch Delivery
  • Feedback
    • Customer Testimonials
    • Reference List
    • Awards
  • Client Login
  • Blog
  • Employment

Organically Kill Crabgrass with These 8 Steps

May 9, 2022 by service@rilawncare.com Leave a Comment

Do you have a problem with crabgrass? If so, you’re not alone. Crabgrass is one of the most annoying problems that you can find on your lawn. Below are the steps that you can take to organically kill crabgrass and help your yard stay crabgrass free.

8 Steps to Organically Kill Crabgrass

  • Soak Your Soil – Use your garden hose or a sprinkler to water your problem area. Then wait around half an hour so that the water has soaked in.
  • Pull the Crabgrass Out = Using a weeding tool or pitchfork, remove the young crabgrass as soon as it’s large enough that you can remove everything, including the roots. If the patch is large, it might take some time. If your lawn is wet enough, however, you might pull some clumps free by gathering its leaves inside your hand using steady pressure and pulling upward.
  • Add Some Compost – Next, add some organic compost to that area. Work your soil so it’s incorporated thoroughly.
  • Seed the Area Using Turfgrass Seed – Seed your area using grass seed. Then cover that area with weed-free straw. This is going to maintain the moisture and also protect your seeds from getting eaten by pests and birds.
  • Keep Your Soil Moist – The area should be watered a few times each day, based on your moisture conditions. Be sure your soil’s moist until your seeds sprout.
  • Start Deep Watering – Once your grass is tall enough so it can be mown, begin irrigating your lawn less frequently and more deeply. Crabgrass is very shallow-rooted. If you’re watering very frequently and only for a short amount of time, it’s going to thrive.
  • Mow Your New Grass – So that your new grass is maintained, mow the grass high. You should leave your grass at a height of anywhere from 2.5 – 3 inches. This is going to let the grass protect itself, and the crabgrass won’t have the light necessary.
  • Weed As Necessary – During the season, you should pull any crabgrass that remains and that is sprouting up. When next year rolls around, you shouldn’t have anymore.

Thank you for taking the time to read our latest blog. Please continue reading our blogs, and contact us to get a quote on our landscaping services.

Filed Under: Plant Information

3 Big Benefits of Mulch Delivery

April 15, 2022 by service@rilawncare.com Leave a Comment

mulch delivery

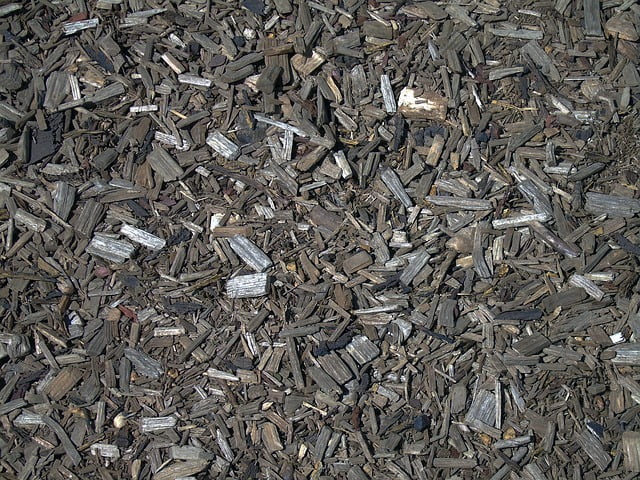
The weather is nice, and that means you are probably thinking about your garden. Have you considered having mulch delivery rather than going to the store and picking it up yourself? Below are 3 benefits of mulch delivery.

Mulch Delivery Benefit 1 – No Lifting and Loading

When you are purchasing the mulch at a store and taking it home, you have to load it into your car. depending on how much you are buying, this can put a lot of strain on both your body and your vehicle. unless you have a truck that’s made to handle a lot of weight. Then when you get to your house you have to do the reverse. You also don’t have to worry about the mulch bag breaking and causing a mess in your trunk.

Mulch Delivery Benefit 2 – You can Buy It in Bulk

When you are buying your mulch at the store, you may be limited as to how many you can buy. Not only that but if they are running low on mulch you may have to go to a few different stores to get the amount that you need. When you have mulch delivered you can get the amount that you need from one convenient place.

Mulch Delivery Benefit 3 – You Save on Gas

One thing that you know when the weather turns nice is that is when the gas prices go up. Above we mentioned how sometimes the store you go to isn’t going to have all of the mulch that you need to finish your project. So, that means using a lot of gas. But when you have the mulch delivered, you don’t have to worry about the gas you are using or the wear on your vehicle.

Mulch delivery is one of the services that we are happy to provide our customers. If you are interested in knowing more about this service, simply contact us here. We are happy to give you a quote and answer any questions that you have. You also can connect with us on Facebook. We look forward to hearing from you soon.

Filed Under: Landscape Tips, Plant Information

DIY Christmas Foliage Decor

November 17, 2018 by service@rilawncare.com Leave a Comment

Reese Moore has a great write up on how to make wreaths with foraged materials. Seen above are 3 different style wreaths plus some foraged garland! (https://www.compostandcava.com/home/2017/12/5/diy-foraged-christmas-wreaths)


This holiday season, impress your guests and neighbors with homemade Christmas decor made from the greenery in your yard! At some point, a lot of hard work went into keeping those plants alive so let them work for you now! The holidays are tough enough on our wallets without going to Michael’s and buying a lot of fake greenery to string up. Save some pennies, enjoy the fresh air, and revel in the pride you’ll feel at creating so much beauty. Pinterest is full of incredible DIY decor ideas but let’s face it, most of us are NOT Martha Stewart and the last thing we need is to waste a bunch of time on a Pinterest fail. We thought it would be helpful to consolidate some ideas that utilize common local plants and aren’t impossible to pull off.

[hcolumns]

Photo by James Carrier, https://www.sunset.com/home/decorating/how-to-make-christmas-wreath#wreath-garland-entry
 

1. Wreaths

It may seem daunting, but wreaths really are pretty easy to pull together. Easiest of all is to use a wire frame purchased from the store (which you can reuse for years) but you can also make a frame out of a sturdy branch. There is a really easy to follow tutorial here: https://www.sunset.com/garden/how-to-make-a-wreath . After putting it off for years, I finally tried it and now it is a Christmas tradition.

Some great commonly found materials to use are: fir, pine, juniper, holly, box wood, sage, rosemary, bay leaves, ivy, lavender and, of course, mistletoe.

Foraged Additions: Berries, pine cones, leaves,

Materials: wire, a frame, scissors

[/hcolumns]

[hcolumns]

2. Garland

With a little wire and patience, you can make beautiful, fresh garland from foraged material. Simply arrange your trimmings and then start securing it with floral wire. Use one piece of wire to give the garland strength, especially important if you intend to hang it as seen in this photo. If you’re decking a railing or mantle, then you can use the wire on individual pieces and secure directly to the structure itself.  Add in ornaments, pine cones, ribbon, lights, etc. but skip the plastic. Your house will smell and look amazing!

Megan Gilger has fantastic easy DIY garland instructions on The Fresh Exchange Blog

[/hcolumns]

[hcolumns]

This simple, elegant planter by Pam from the House of Hawthornes blog is ridiculously easy to make.


3. Porch/Exterior Planters

It is so simply to add a little holiday spirit to your entry way or porch by pulling together a quick planter. I can’t stress how simple yet striking these can be. All you really need is a decent pot or urn. Fill it with dirt, old potting soil, rocks, sand, or the foam blocks from the store… literally anything to help the material stay in the way you want it to be arranged.

[Show slideshow]
Winter-Porch-Pots-Tutorial-6016
planter8-400x530
Diy Christmas Planters Awesome Outdoor Christmas Planter ? Holiday Planters
traditional-winter-container
diy-christmas-planters-beautifully-festive-ways-to-decorate-your-porch-for-making-outdoor
1482261872581
4639f2a835fd60ac9a77890c37663a77
diy-christmas-planters-easy-outdoor-christmas-planters

[/hcolumns]

[hcolumns]

4. Finishing touches and small details

Honestly, at Christmas I cover just about every surface imaginable with festive decor. If nothing else, gather some pine cones, trimmings, and holly berries and use them to decorate place settings, mantles, windows, etc.; put that Christmas foliage anywhere you see fit!

[Show slideshow]
Simple-Gold-Christmas-Table-by-The-DIY-Mommy-3
CranberryandGreeneryChristmasTable_thumb1
Simple-Gold-Christmas-Table-by-The-DIY-Mommy-4
tableseettingreeddavidphotographylowes
wrapping1420675507908
diy-christmas-wrapping-paper-cover
wrappingxmas
wrapping31568829851_a461881ca3_b
breakfast-room-christmas-1533582111
DIY-Christmas-Centerpiece-Ideas-To-Complete-Your-Table-Rustic-Christmas-Centerpiece-1
tableset4-57e13f905f9b586516b5ab3a

[/hcolumns]


Truthfully, it is so simply and rewarding to go outside and collect some materials that are probably destined for the yard refuse pile/bag anyway and decorate for the holidays with it. A few clippings from your pine tree, some pine cones, some holly… you can literally just lay it on your mantle and it will look festive and elegant. It’s really a win win win win: clean your yard, prune your bushes, get some fresh air, save some money, and have beautiful decor to impress guests! To help your homemade foraged goods last longer, you can spray them with an anti-desiccant but it’s not really necessary. I’ve found my live decor to last the entire month of December (we do keep the house pretty cool though). Here are some tips to keep your creations looking fresh. Exterior fixtures are the easiest to keep looking fresh and will require no attention aside from straightening after a strong wind. So get out there, collect some items, and start creating! This new holiday tradition will be enjoyed by the whole family and we hope to see some festive entryways a we finish up for the season!

Filed Under: Landscape Tips, Plant Information, Uncategorized

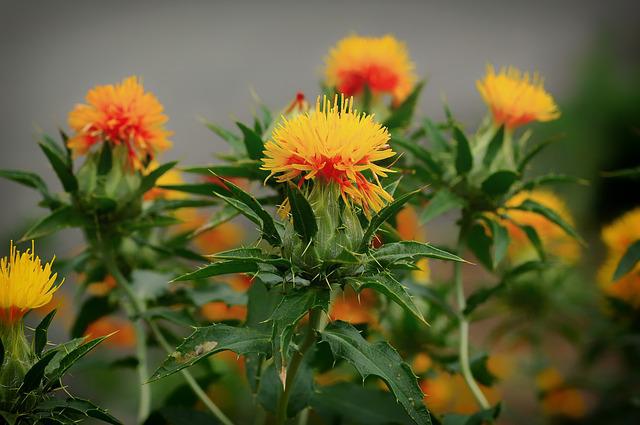
Backyard Apple Growing

August 20, 2018 by service@rilawncare.com Leave a Comment

One of my favorite past times is going apple picking at one of the many Rhode Island orchards. I can remember being so shocked by the varieties grown here in Rhode Island. “What? There’s more than just McIntosh, Granny Smith, Fuji, Gala, and Honey Crisp?!” Our economy favors monocultures and of the thousands of varieties which exist, only about 5 different types of apples can be found in most grocery stores. This lack of biodiversity makes plants more susceptible to disease, fungus, and bugs. Thus, most small scale orchards host a much larger variety of species both for economic and environmental reasons. If you have visited local orchards and ever wondered if you could grow apples in your own backyard, then we have a few tips and tricks which should help your venture be fruitful. 

1. You don’t need an orchard!

Apple trees do not necessarily require acres to grow. Dwarf apple trees need as little as 4-8 ft and other full size varieties require about 15-20 ft. Dwarf apple trees lend themselves well to creating a practical hedgerow when grown flat against a lattice or even an existing fence, this is called an espalier. A note here that dwarf varieties are notorious for uprooting and actually need a sturdy something to support them. Just imagine, you could add a tasty and sightly natural fence in your yard!

 
2. Biodiversity is your friend!
You may already know but it’s fairly important to have more than one apple tree for pollination purposes. You may get lucky if you’ve chosen the right variety and/or your neighbor has some apple trees, but many varieties are sterile and those that aren’t will benefit from cross pollination. In addition to yielding more fruit, it’s a good idea to have several apple trees of different varieties for health reasons. This will help ensure that if one of your trees is afflicted by a disease or fungus, your other trees of a different species will be unaffected and able to survive.

3. Organic is hard, but worth it.

According to The Farmer’s Almanac, “many gardeners who swear off pesticides find they need to find, at minimum, an acceptable annual spray treatment for a decent crop.” As mentioned, pollination is an important part of our love affair with apples. Spraying apple blossoms with pesticides while relying on bees to grow said apples is both cruel and unusual. Although apples can be prone to disease, fungus, and pests, it is worth using the many tried and true natural methods to grow your fruit. It’s not only better for you and your neighbors but makes a remarkable difference in the health of our environment. To quote my 2 year old daughters favorite book, Bee and Me by Elle J. McGuiness:

“if it weren’t for us bees, why the plants would be gone. No more peaches. No cherries. No trees to climb on. There’d be no more apples, no flowers to smell. Still, you humans decide you don’t like us that well.”

Most local nurseries will have a variety of species to choose from but mail order sites are an option as well. If you plant an apple tree from seed, then it will likely take 8-10 years before you can taste the fruit of your efforts, so we recommend starting with a young tree from a nursery. All the planting techniques outlined in last months blog are applicable to fruit trees, so reference that and The Farmers Almanac when planting. You’ll need good, well-drained soil, at least 6 hours of sun, and a lot of water at first. I assure you though, this hard work will pay off when you’re kids and grandkids are out crunching apples next year and for years to come. Not to mention the pride you’ll feel when you show up to Thanksgiving with a homemade, home grown apple pie.


Filed Under: Uncategorized, Plant Information Tagged With: apple trees, apples, bees, grow your own, homestead, orchard, Organic, pollinators

Winter Pruning Techniques

November 17, 2016 by service@rilawncare.com Leave a Comment

Cold weather is upon us. The days are shorter, the heat has been turned on, and we’ve all thrown an extra blanket or two on our beds. A lot of us will stay inside until we absolutely have to go out for something. We think longingly of the spring and summer days spent planting, mowing, or just relaxing and enjoying the beautiful, fresh, colorful landscape we’ve created (or had created) for ourselves. We think to ourselves, “I guess I’ll just have to wait until spring to start working on making my yard beautiful again.” But wait! There IS something we can do during the cold months to help our yard flourish in the spring and summer! What is this activity that can help us create some excitement, give us a reason for going outside, and make us feel like we’re doing something positive for our landscape? The answer is simple: winter pruning.

Late winter is generally the best time to prune, specifically late February and early March in New England. There are some exceptions to this, but pruning during the winter months will usually lead to a burst of new growth in the spring and if that is the effect you’re looking for, you should absolutely go for it. Most plants remain dormant during the winter months, so when they “wake up” in the springtime, they’ll grow a lot faster when pruned properly during dormancy. Pruning deciduous plants in the winter also makes it a lot easier to see their shape since their foliage is gone. You may notice that some trees, such as maple, walnut, and birches, may begin to “bleed” during pruning. This is just the sap flowing out of the tree and is not harmful. The trees should stop “bleeding” when it begins to leaf out in the spring.

So what are some actual techniques to employ while pruning? First, you’re going to want to prune on a more mild, dry day. Then make sure you first go after any dead and/or diseased branches on the plant you are pruning. When dealing with diseased branches, remember to disinfect any shears or saw blades between each cut as to avoid spreading the disease to other, otherwise healthy plants. Next, remove any overgrown branches and twigs that may be limiting any light or air at the crown (branches, leaves, and any reproductive structures that extend from the trunk of main stems) of the tree. Cut the branches at their nodes, the points at which one branch or twig attaches to another. Keep in mind that the overall goal is to keep branches that will develop and maintain the structure of the tree. It is also important to make sure you’re using the correct tools while pruning. Select tools that will keep a nice, sharp edge, and are relatively easily sharpened. Make sure to properly care for your equipment so that it lasts longer and helps to keep your plants healthy.

While pruning can be done at almost any time of the year, it is always important to prune when it will cause the least amount of damage to the plant. Pruning at the wrong time of the year won’t necessarily kill plants, but continued improper pruning can definitely result in damaged or weakened plants.


Filed Under: Plant Information, Landscape Tips

  • 1
  • 2
  • 3
  • Next Page »

Log in